What? Why? #
There are instances when your Linux operating system may encounter some problems and stop working as expected. This could be as a result of a defective update, incorrect commands or configurations, or accidental system corruption. Common ways a Linux system can be compromised include:
- Removal of the cd command by executing sudo rm
/bin/cd - Corruption of the
/etc/profile file - Corruption of the
/etc/passwd file
In some cases, a poorly configured /etc/profile file could prevent successful login to the system.
What to do? #
If your operating system (OS) is compromised and unable to boot, there're viable options for recovery, especially if you have a secondary OS installed on your system.
One option is to boot from a USB flash-drive-based OS, an ideal backup plan for such situations. Alternatively, you can boot a functioning OS on the same machine and then run your compromised OS through a virtual machine like VirtualBox.
Why is it convinient? #
Doing so will enable you to interact with your OS as usual, carry out diagnostic searches for potential solutions online, and then apply the suggested remedies within VirtualBox. Importantly, any changes or corrections made within VirtualBox will reflect directly on your physical hard drive, thereby resolving the issues with your original OS.
This process provides a practical and efficient way to troubleshoot and rectify system errors, while minimizing the risk of causing further damage to your system.
Let's get started #
Setting Up VirtualBox on Windows #
1. Installing VirtualBox #
Assuming you already have VirtualBox installed, you can proceed to the next step. If not, you can download it from the official website.
2. Initiating PowerShell #

Launch PowerShell to execute the subsequent commands.
3. Listing All Hard Drives #
To identify the actual names of your hard drives as recognized by Windows, we use the Windows Management Instrumentation Command-line (WMIC) utility. Execute the following shell command:
wmic diskdrive list brief

Caption                  DeviceID            Model                    Partitions  Size
Samsung SSD 970 EVO 1TB  \\.\PHYSICALDRIVE1  Samsung SSD 970 EVO 1TB  3           1000202273280
KINGSTON SA2000M81000G   \\.\PHYSICALDRIVE2  KINGSTON SA2000M81000G   1           1000202273280
Samsung SSD 870 QVO 1TB  \\.\PHYSICALDRIVE0  Samsung SSD 870 QVO 1TB  3           1000202273280
This command returns a brief list of disk drives. The DeviceID is of particular interest to us. \\.\PHYSICALDRIVE1
4. Creating a VirtualBox Volume #
Navigate to your VirtualBox directory. A standard location on most Windows systems is C:\Program Files\Oracle\VirtualBox. Execute the following commands:
./VBoxManage.exe internalcommands createrawvmdk -filename "C:\Users\Ivan\Learnign\VM\voidlinux.vmdk" -rawdisk \\.\PHYSICALDRIVE0
Details:
createrawvmdk instructs the system to create a Virtual Machine Disk (VMDK);-filename "C:\Users\Ivan\Learnign\VM\voidlinux.vmdk" defines the location for the new file;-rawdisk \\.\PHYSICALDRIVE0 identifies the physical hard drive;
5. Adding Physical Hard Drive Reference to VirtualBox #
Launch VirtualBox as an administrator, then navigate to File > Tools > Virtual Media Manager from the toolbar. Add the newly created voidlinux.vmdk file.
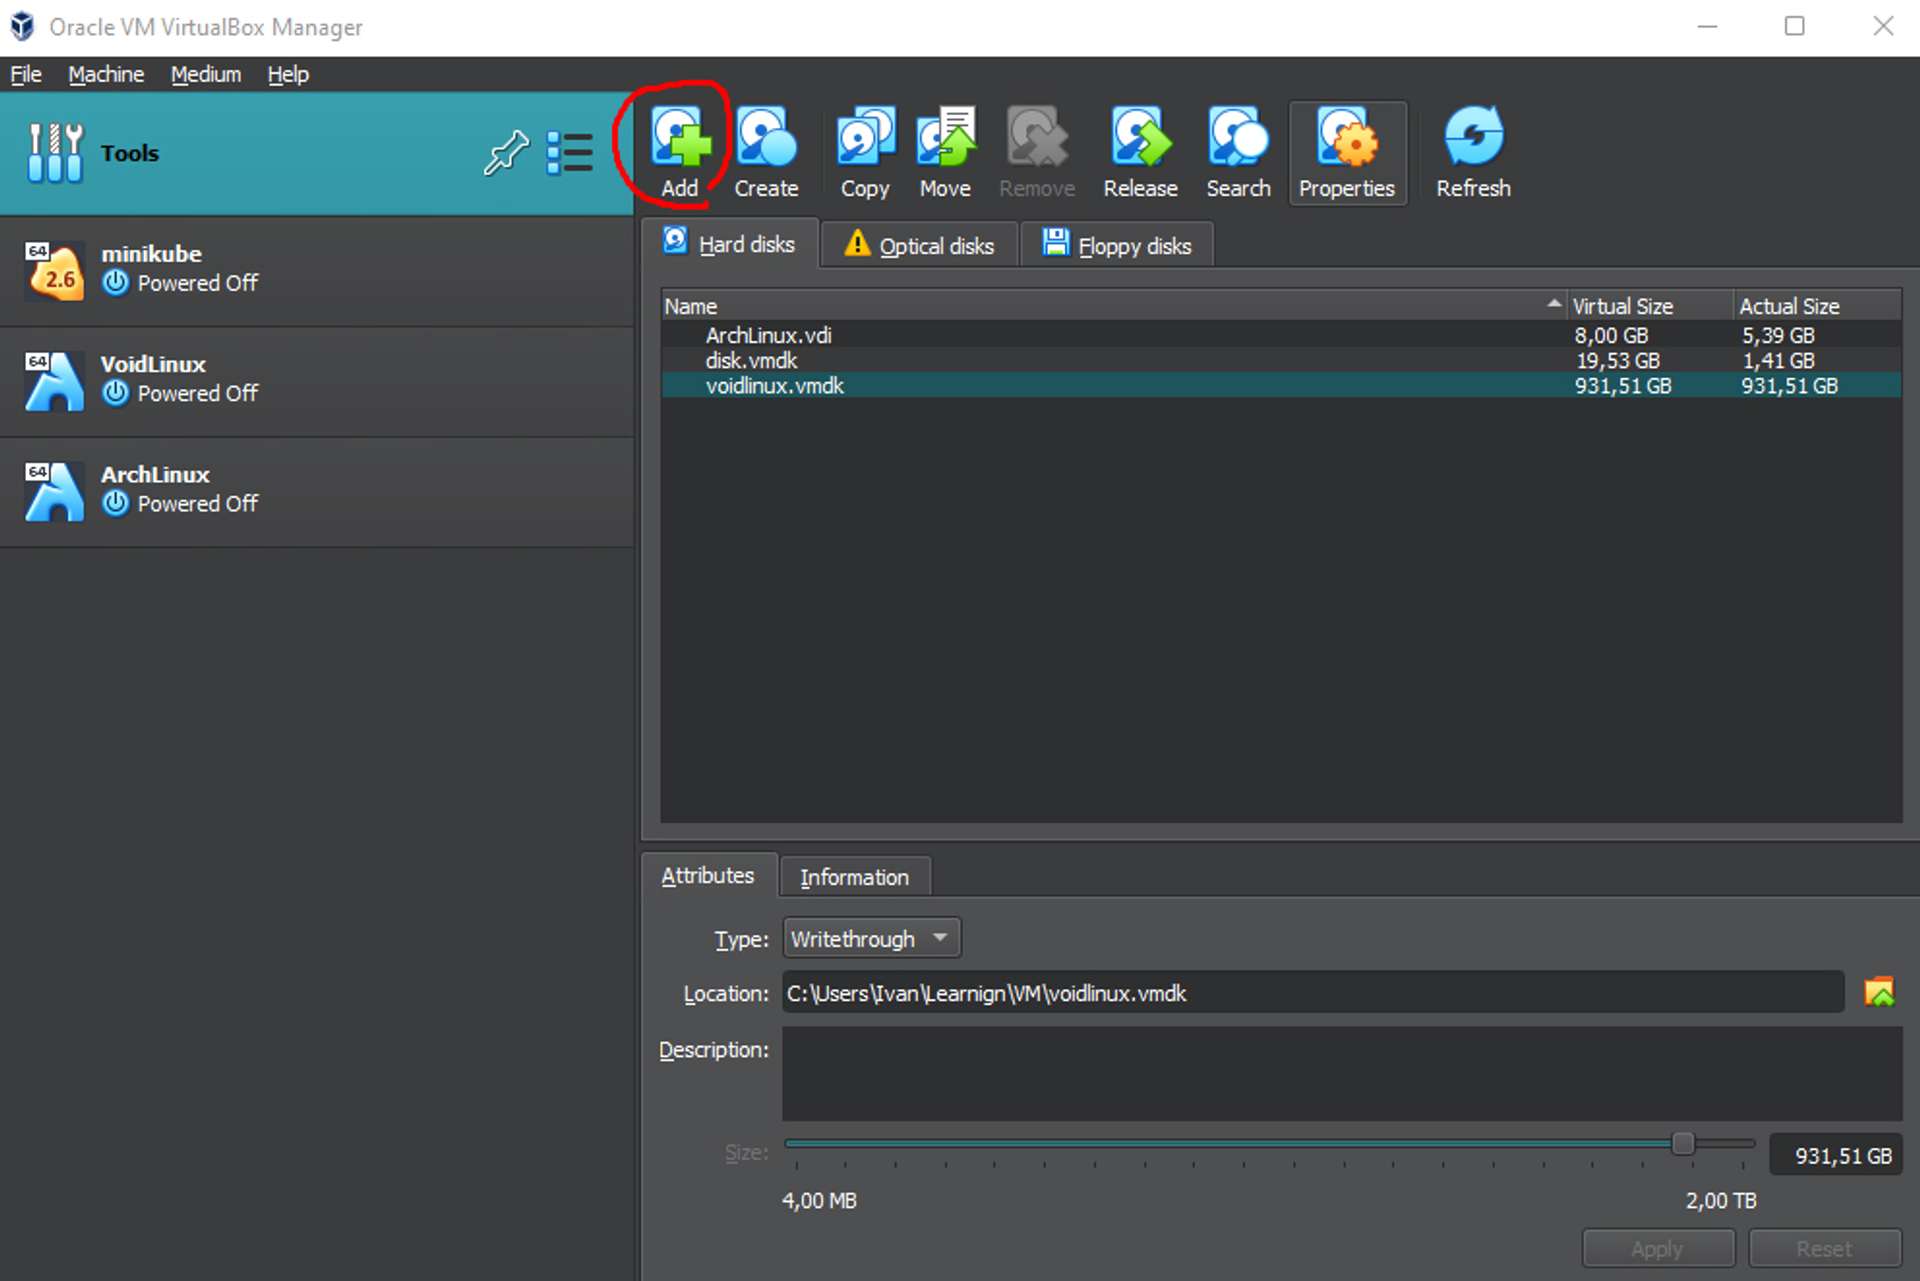
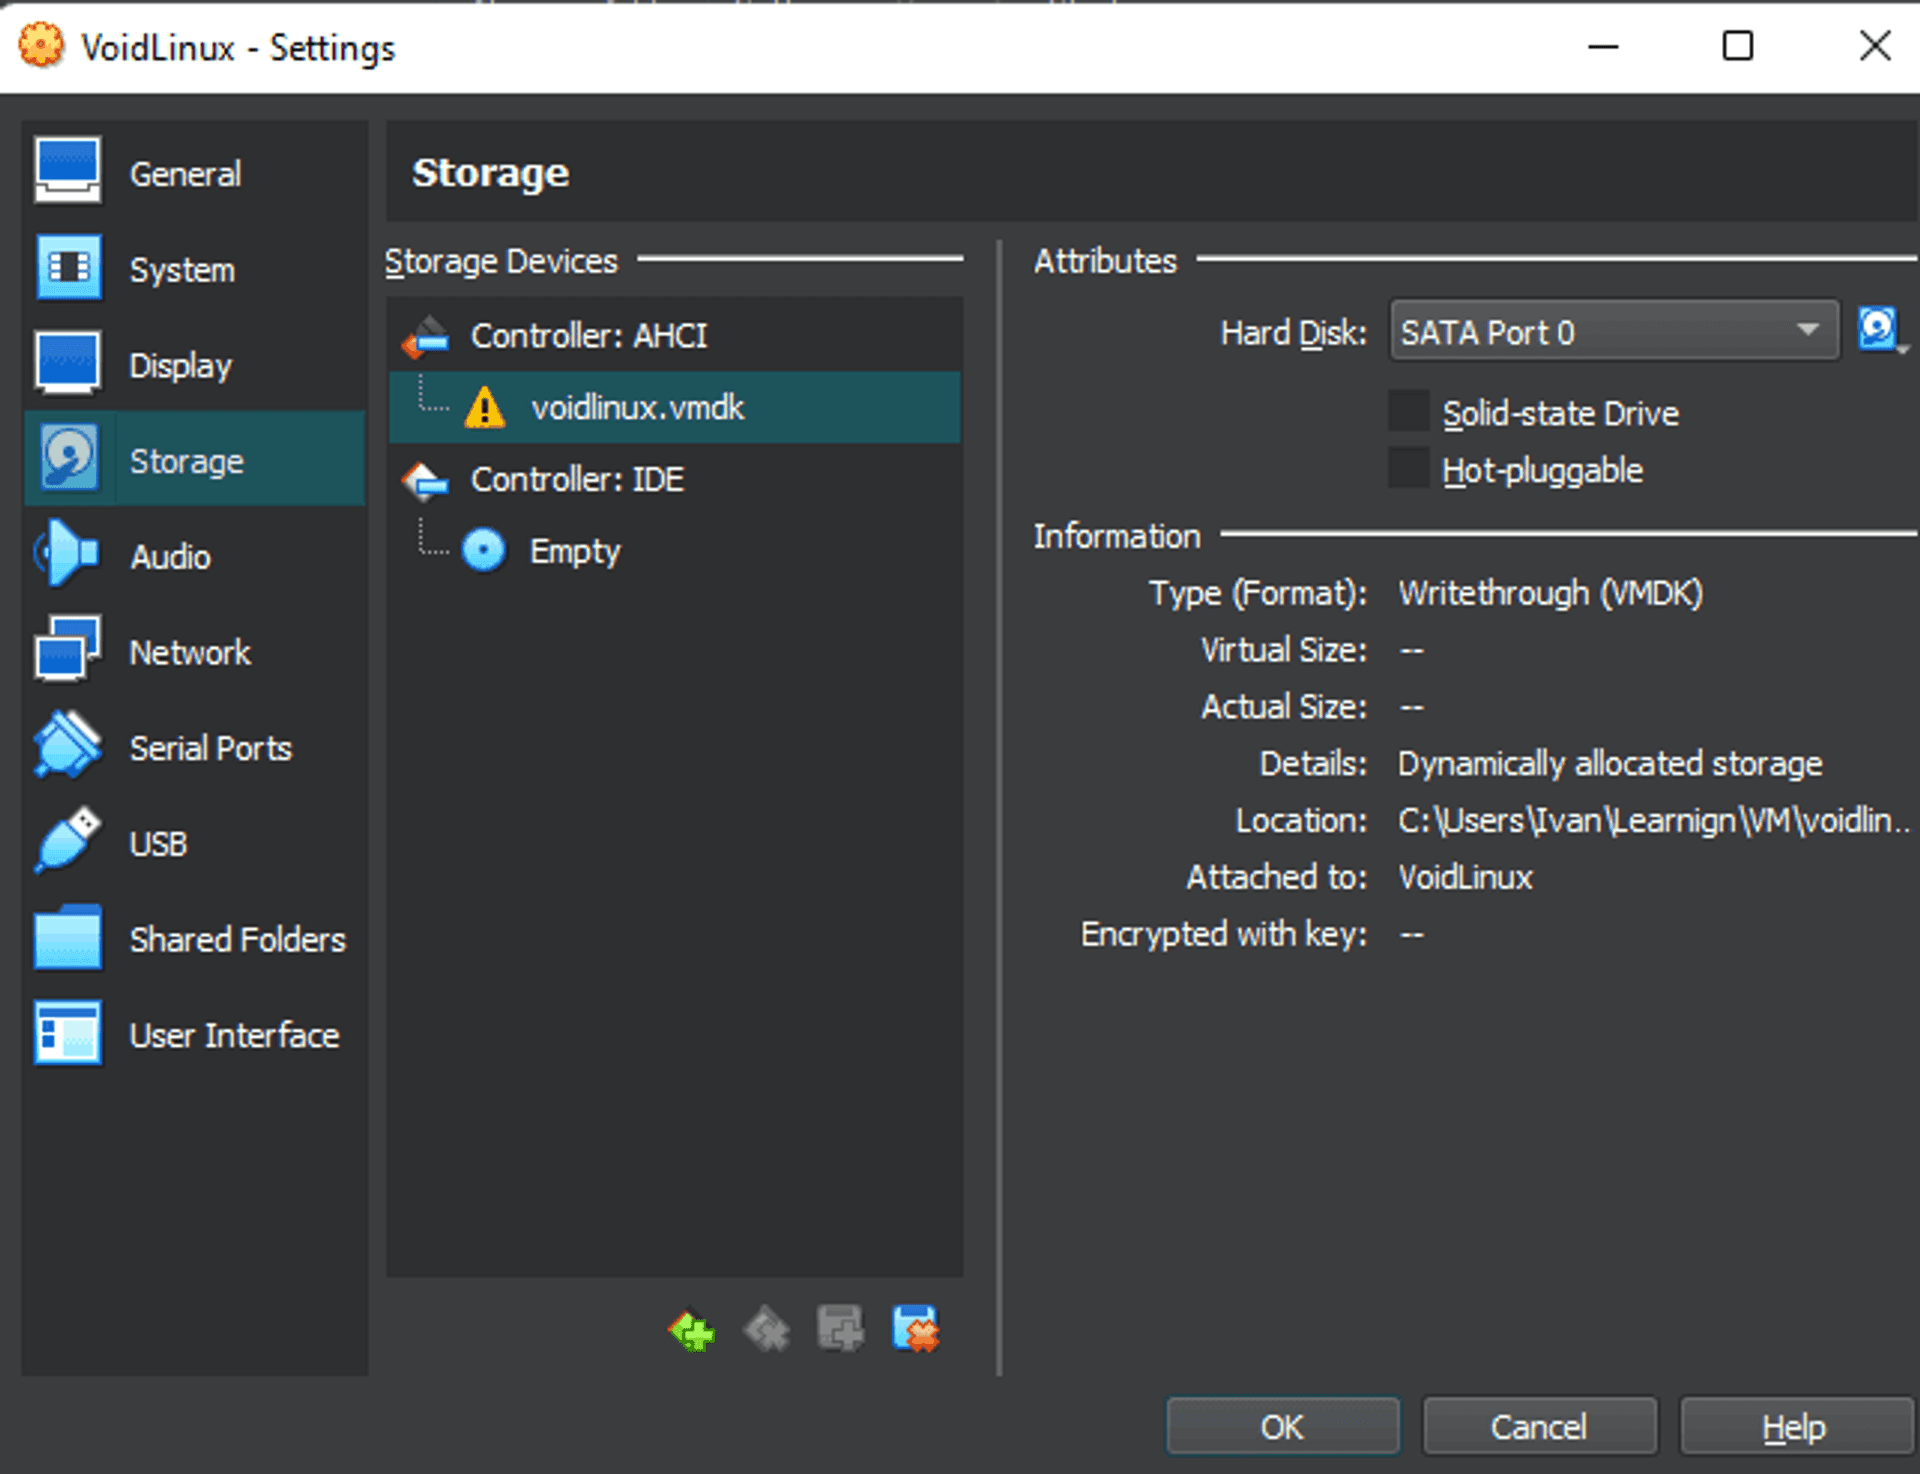
Access your VM settings and include the VDMK:
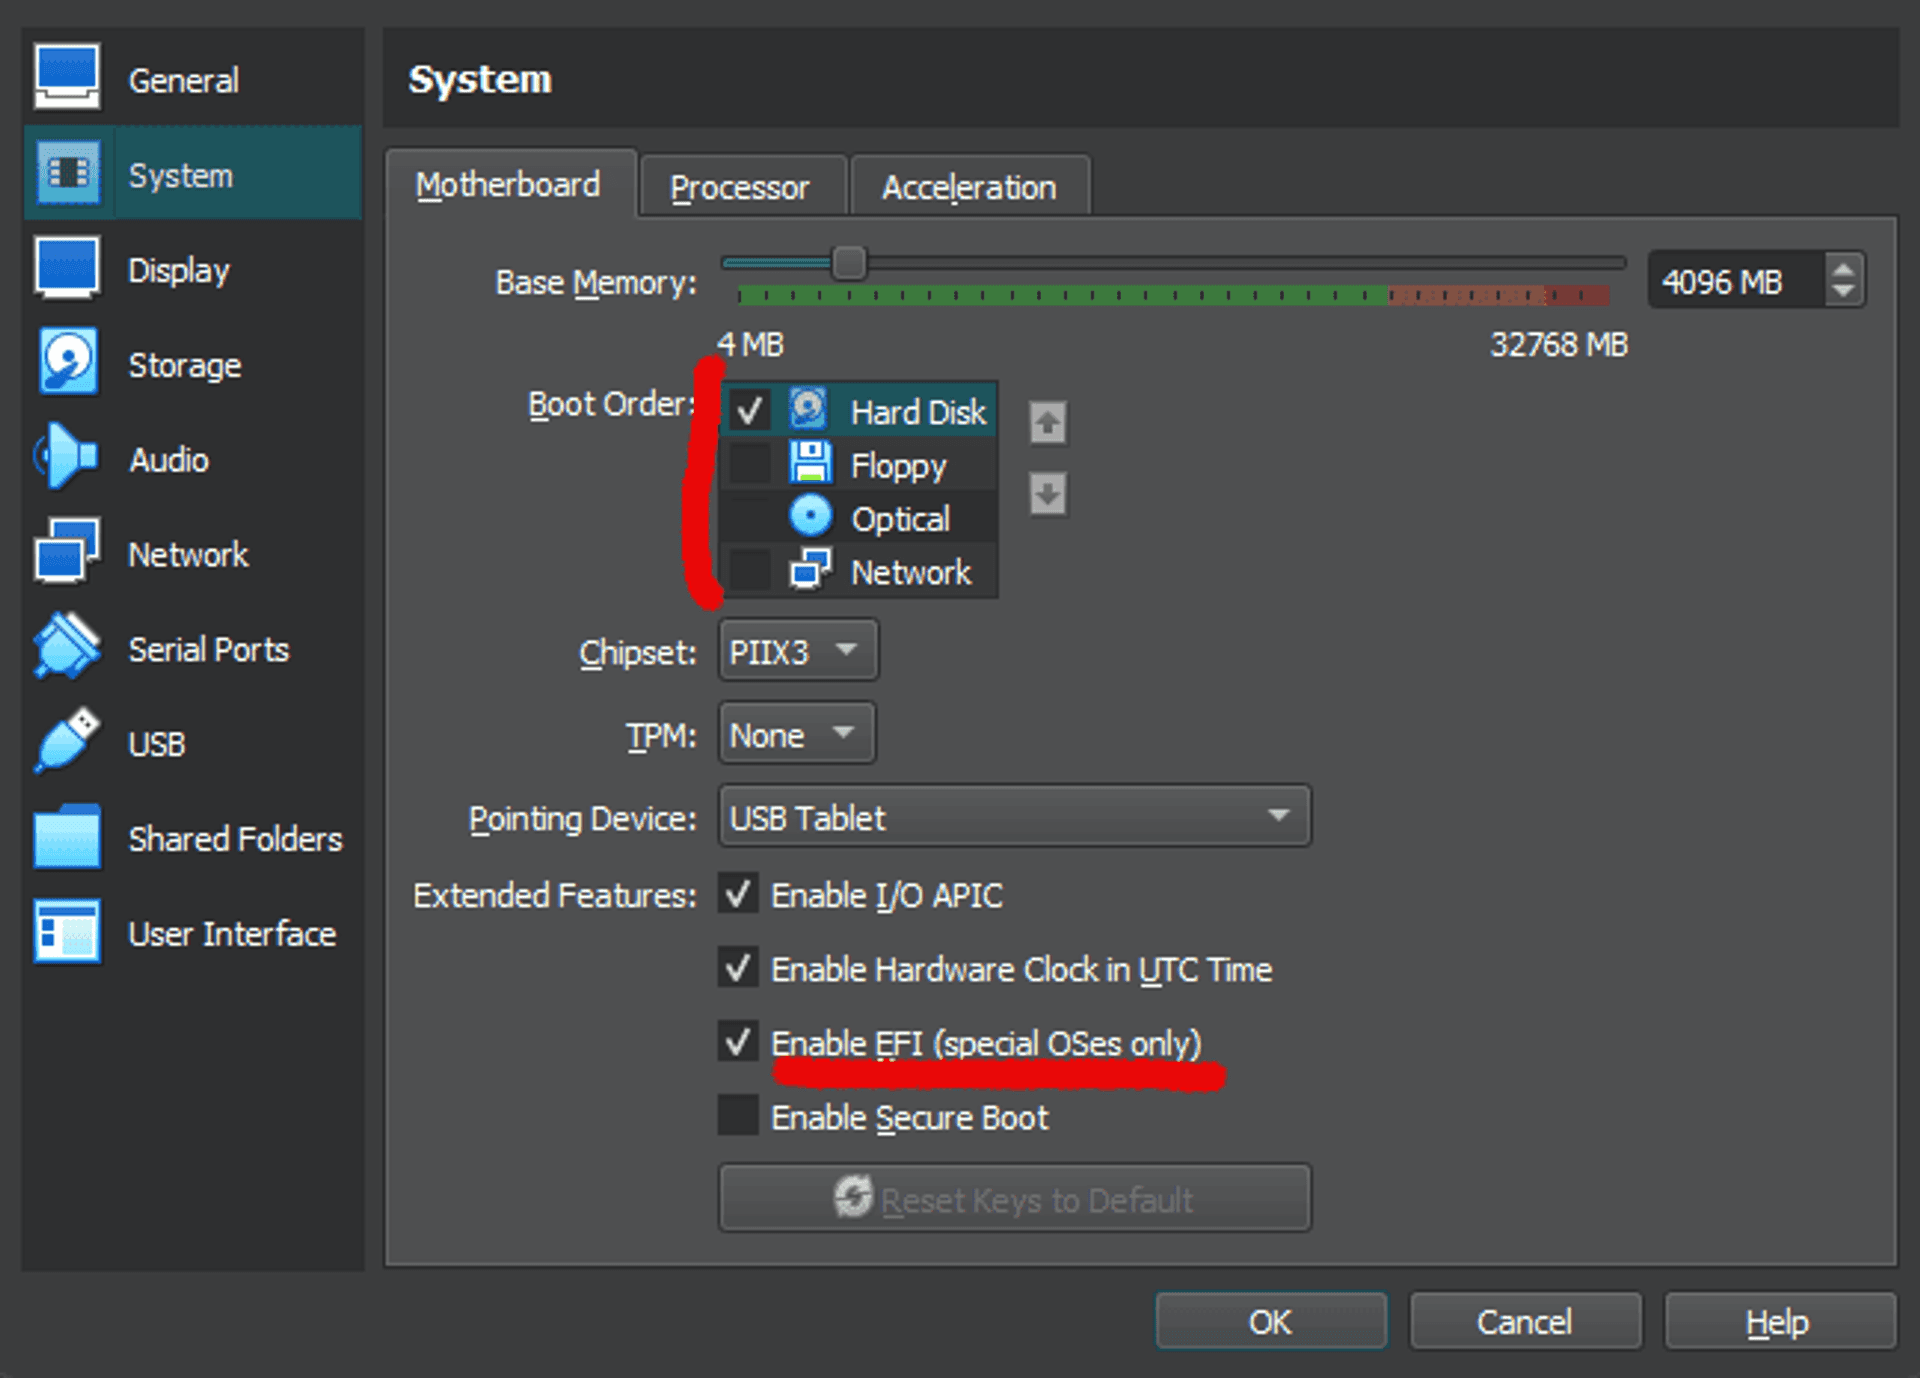
7. Finalizing Settings and Launching Your Machine #
Before starting your machine, ensure that the necessary flags are ticked. You may require additional flags, but the provided ones should generally suffice.
Resolving Potential Errors #
Access Denied Error (VD: error VERR_ACCESS_DENIED) #
If you encounter this error, ensure that VirtualBox is running as an administrator. Potential remedies include:
- Launch VirtualBox as an administrator
- Execute VirtualBox from
PowerShell, ensuring that PowerShell is also running as an administrator. - Remove VirtualBox from autostart, reboot your PC, and try again
System Aborts with Another Error #
In the event of encountering an unidentified error, consider revising the settings of your system in VirtualBox and experiment with different combinations.
🙏🙏🙏
Since you've made it this far, sharing this article on your favorite social media network would be highly appreciated 💖! For feedback, please ping me on Twitter.
Published